CONVENTIONAL NDT SERVICES
RADIOGRAPHY TESTING
In radiographic testing, the part to be inspected is placed between the radiation source and a piece of radiation sensitive film. The radiation source can either be an X-ray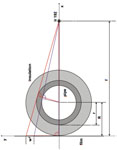 machine or a radioactive source. The radiation that passes through the part will expose the film and forms a shadow graph of the part. The film darkness (density) will vary with the amount of radiation reaching the film through the test object where darker areas indicate more exposure (higher radiation intensity) and lighter areas indicate less exposure (higher radiation intensity).
APPLICATIONS:
- Weld inspection – Structural / Piping
- X-Rays, Gamma Rays (Iridium 192, Selenium 75, Cobalt 60)
- SCAR Radiography, Close Proximity Radiography
- Corrosion Under Insulation (CUI), Profile Radiography
- Casting / Forgings / Regulators
COMPANY’S CREDENTIALS / APPROVALS / ACCREDITATION:
- IS/IEC – 17025
- DNV 402B
- PED
- SAC-SINGLAS
PERSONNEL QUALIFICATIONS:
PCN, PED, ISO 9712, EN 473, ASNT Level 2/3
ULTRASONIC TESTING
Ultrasonic Testing (UT) uses high frequency sound energy to conduct examinations and make measurements. Ultrasonic inspection can be used for flaw detection/evaluation, 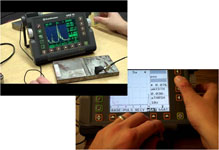 dimensional measurements, material characterization, and more. To illustrate the general inspection principle, a typical pulse/echo inspection configuration as illustrated below will be used.
APPLICATIONS
- Weld inspection – Structural / Piping
- Lamination Checking in Plates/Pipes
- Casting / Forgings / Valves
COMPANY’S CREDENTIALS / APPROVALS / ACCREDITATION
- IS/IEC – 17025
- DNV 402B
- PED
- SAC-SINGLAS
PERSONNEL QUALIFICATIONS:
PCN, PED, ISO 9712, EN 473, ASNT Level 2/3
Conventional NDT Services
MAGNETIC PARTICLE TESTING
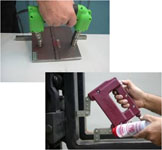
Magnetic particle inspection (MPI) is a non destructive testing method used for defect detection in magnetic materials. MPI is fast and relatively easy to apply, and part surface preparation is not as critical as it is for some other NDT methods. These characteristics make MPI one of the most widely utilized non destructive testing methods.
APPLICATIONS
- Weld inspection – Structural / Piping
- Casting / Forgings / Valves
COMPANY’S CREDENTIALS / APPROVALS / ACCREDITATION
- IS/IEC – 17025
- DNV 402B
- PED
- SAC-SINGLAS
PERSONNEL QUALIFICATIONS
PCN, PED, ISO 9712, EN 473, ASNT Level 2/3
PENETRANT TESTING
Liquid penetrant inspection is a method that is used to reveal surface breaking flaws by bleed out of a coloured or fluorescent dye from the flaw. The technique is based on the ability of a liquid to be drawn into a “clean” surface breaking flaw by capillary action.
APPLICATIONS
- Weld inspection – Structural / Piping
- Casting / Forgings / Valves
COMPANY’S CREDENTIALS /APPROVALS /ACCREDITATION
- IS/IEC – 17025
- DNV 402B
- PED
- SAC-SINGLAS
PERSONNEL QUALIFICATIONS
PCN, PED, ISO 9712, EN 473, ASNT Level 2/3
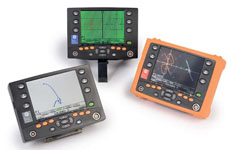
EDDY CURRENT TESTING (ECT – WELD INSPECTION)
Eddy currents are created through a process called electromagnetic induction. When alternating current is applied to the conductor, such as copper wire, a magnetic field develops in and around the conductor. This magnetic field expands as the alternating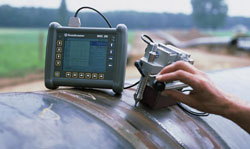 current rises to maximum and collapses as the current is reduced to zero. If another electrical conductor is brought into the close proximity to this changing magnetic field, current will be induced in this second conductor. Eddy currents are induced electrical currents that flow in a circular path. They get their name from “eddies” that are formed when a liquid or gas flows in a circular path around obstacles when conditions are right.
APPLICATIONS
- Weld inspection – Structural / Piping
- Casting / Forgings / Valves
- Painted Surface
- Jack Up Rig, Semi Submersible Rigs, Marine & Offshore Structures
COMPANY’S CREDENTIALS / APPROVALS / ACCREDITATION
- ISO/IEC – 17025
- SAC-SINGLAS
PERSONNEL QUALIFICATIONS
PCN, EN 473, ASNT Level 2 / 3
POSITIVE MATERIAL IDENTIFICATION (PMI-XRF)
Positive Material Identification is a well established analytical materials testing and materials identification technique used throughout industrial plant as well as within the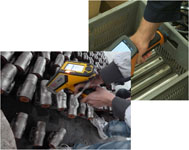 metal assembly and component manufacturing industries. It guarantees a material’s elemental composition as required for safety compliance and quality control.
APPLICATIONS
- For Materials other than Carbon Steel
- Material Identification, sorting out and confirmation
COMPANY’S CREDENTIALS/APPROVALS/ ACCREDITATION
- ISO/IEC – 17025
- SAC-SINGLAS
POSITIVE MATERIAL IDENTIFICATION (PMI-OES)
PMI-Arc is a well established analytical materials testing and materials identification technique used throughout industrial plant as well as within the metal assembly and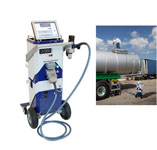 component manufacturing industries. It guarantees a material’s elemental composition as required for safety compliance and quality control.
APPLICATIONS
- For materials – Carbon Findings
- Identification, sorting out and confirmation
COMPANY’S CREDENTIALS / APPROVALS / ACCREDITATION
- ISO/IEC – 17025
- SAC-SINGLAS
HARDNESS TESTING
Hardness is a characteristic of a material, not a fundamental physical property. It is defined as the resistance to indentation, and it is determined by measuring the permanent depth of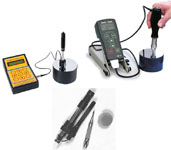 the indentation. More simply put, when using a fixed force (load)* and a given indenter, the smaller the indentation, the harder the material..
APPLICATIONS
- Verification of Hardness after PWHT
- Material Hardness verification after machining
VISUAL INSPECTION – (VIDEOSCOPE)
Visual inspection, with or without optical aids, is the original method of NDT. Many defects are surface-breaking and can be detected by careful direct visual inspection. Optical aids include low-power magnifiers, microscopes, telescopes and also specialised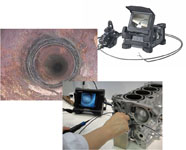 devices such as boroscopes, endoscopes and other fibre-optic devices for the inspection of restricted access areas. These devices can also be used with television camera systems. Much of the success of visual inspection depends on the surface condition and the lighting arrangements.
APPLICATIONS
- Internal Pipe Weld Root Inspection
- Blockage, cleanliness and condition inspection
- Pressure vessel internal inspection
COMPANY’S CREDENTIALS / APPROVALS / ACCREDITATION
- ISO/IEC – 17025
- SAC-SINGLAS
PERSONNEL QUALIFICATIONS
PCN, EN 473, ASNT Level 2/3
FERRITE INSPECTION
In the petrochemical sector, in off-shore oil producing facilities and in steel construction: Fast and non-destructive determination of the ferrite content in austenitic and duplex steel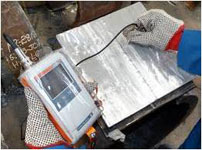 with an acquisition of all magnetizable portions of a structure, i.e., in addition to delta ferrite also stress-induced martensite or other ferritic phases.
APPLICATIONS
Ferrite content to check in Austenitic Steel, Duplex Steel.
HOLIDAY TESTING
Holiday test or a Continuity test is one of the non destructive test method applied on protective coatings to detect unacceptable discontinuities such as pinholes and voids. The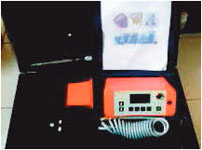 test involves checking of an electric circuit to see if current flows to complete the electrical circuit..Portable holiday detectors are designed for various pipeline, plant, and other surface applications where the inspection surface remains stationary and the detector is moved over the inspection surface. High voltage detectors are used for thicker surface coatings, such as those used on pipelines and other industrial applications. Low voltage, wet sponge detectors are used for thin film applications.
PAINT/ COATING THICKNESS MEASUREMENT
Dry Film Thickness is a critical measurement in the coating application process. It provides vital information as to the expected life of the substrate, the product’s fitness for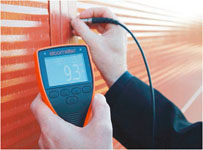 purpose, its appearance and ensures compliance with a host of International Standards.
TRACK RECORDS
EMAS FPSO / SEMB CORP COGEN
